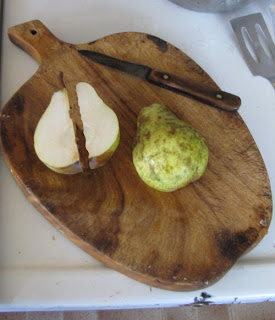
 cut pear in half and quarters lengthwise (photo by ory) |
You will need:
pears
sharp paring knife
items for whatever you want to do with the pears
Pears can seem quite difficult to peel and core because of their odd shape. This method is the quickest I have found to peel pears, assuming that I don't want to end up with perfect halves. That requires a different technique.
First of all, choose the pear. If you've gotten your pears from an abandoned tree, there are likely to be a lot of imperfect ones. The one in the picture above is quite regular, without insect damage. I chose that for the pictures, but you can use this same basic idea even if the pear has odd contortions from insect stings. You'll just need to cut out any damaged sections. Cut the pear into lengthwise quarters.
 remove the core (photo by ory) |
Then hold the pear with the midline up and the base of the pear toward you.
Place the knife behind the stem, or if the quarter does not contain the stem, behind the hard, cord-like rib which will lie on the midline. With one motion cut that out, and then slice deeper as you reach the section containing the seeds to remove that part of the core. Bring the cut back to be more shallow as you approach the blossom end, and cut off that end too.
 remove the peel (photo by ory) |
Turn the pear quarter over, and remove the peel with a shallow cut behind the skin. You can accomplish this with very little waste with a
sharp knife and a bit of practice.
This will leave you with a long, narrow slice of peeled pear. That is, if you started with a nicely shaped pear. But even if there was a bad spot or oddly-shaped place, you can still salvage as much good fruit as possible with this method, and the core isn't too difficult to remove.
| Then you can cut the good portion of the pear into whatever size chunks you desire.
Don't forget to compost the waste! |


